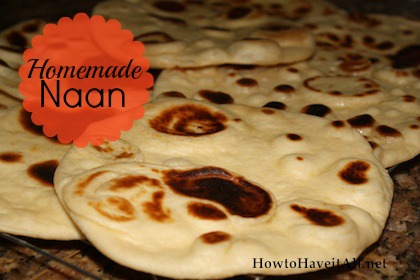
Naan is a wonderfully moist, soft and delicious Indian flatbread easily recognizable by the brown bubbles that decorate its surface. They can be used to make personal pizzas, breadsticks, torn into pieces and dipped in your favorite dipping oil or used in place of tortillas or pita bread for sandwiches and wraps etc. I always assumed they’d be so much harder to make then they are—as I find most things are after I try my hand at them; all it takes is a little time and patience! Learn to make these delicious flatbreads and you’ll be surprised at just how many ways you’ll find to use them to change up old tired meals.

As with most bread recipes, naan uses yeast. This means you need to allow time for the dough to rise. It takes anywhere from 45 minutes to an hour for the naan dough to rise and double in size. Once the rise occurs, take the dough and cut it into eight equal wedges. These wedges will then be rolled into a ball followed by rolling it out with a rolling pin.
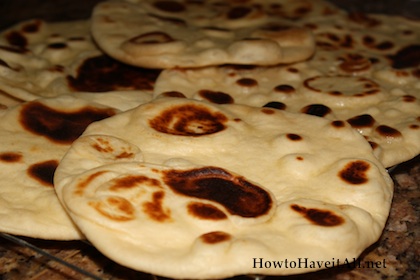
The naan dough is then cooked in a hot skillet for about 3 minutes per side. An easy way to tell when the naan is done is when the dough has the brown bubbles!
- 2 tsp. active dry yeast
- 1 tsp. sugar or honey
- ½ cup water (warm to the touch)
- 2 ½ - 3 cups flour (all purpose or bread flour)
- ½ tsp. salt
- ¼ vegetable or olive oil
- ⅓ cup plain Greek yogurt
- 1 egg
- In a small bowl dissolve the yeast and sugar in the warm water and set aside for a few minutes until it becomes frothy on top (this demonstrates your yeast is active).
- Once frothy, stir in oil, yogurt & egg until well combined.
- In the bowl of a stand mixer combine 1 cup of flour and salt then add the wet ingredients and stir with a wooden spoon or dough whisk.
- Add flour ½ cup at a time until you can no longer easily stir it (approximately 1-1 ½ cups flour total).
- Attach the bread hook to the stand mixer and at this point knead on speed 2 for 2-3 minutes, add additional flour by the tablespoon if dough becomes sticky. The end result should be a smooth and soft dough but not sticky to the touch.
- Remove dough from bowl onto a lightly floured surface, shape into a ball by pulling the top under to the bottom several times as you rotate the ball in a circle. Cover loosely with saran wrap or put the bowl over the top and let rise until doubled in size (about 45 minutes to an hour).
- Once doubled in size, gently flatten the ball into a disc and cut into 8 equal portions.
- Shape each piece into a small ball by once again stretching the top under to the bottom of the ball as you rotate it in a circle, this creates a smooth, taught ball.
- Heat a large skillet over medium heat (you do not want to burn them so do not use high heat). Wait to coat the pan with cooking spray or olive oil until just before you’re ready to place the dough on the pan & you’ll need to re-grease in between each batch.
- Working one ball at a time roll out using a rolling pin until the ball is about 6 inches in diameter and approximately ¼ inch thick.
- Grease the pan and gently place the rolled out dough onto the hot skillet and cook until VERY LARGE BUBBLES form across the surface----little ones will pop up first but don’t rush---bigger bubbles will form and the bottom needs time to crisp up (approximately 3-4 minutes).
- Flip when big bubbles appear and cook top for an additional 2-3 minutes or until bubbles are golden brown.
- If desired brush each as you remove them from pan to a wire rack to cool with olive oil or melted butter & sprinkle with fresh herbs or cheese.
- Continue with additional balls using the same method and re-greasing pan as you work. Wipe the pan out with a cloth if the residual oil is browning as you work through the batches.
- Serve & enjoy. If storing leftovers place between sheets of parchment paper and seal in an airtight container once fully cooled.
Make sure you check out my other easy recipes in my recipe index!
Latest posts by Ashley @HowtoHaveitAll (see all)
- Creamy Mushroom Soup Recipe - March 14, 2016
- How to Make Grilled Paninis - February 29, 2016
- Quinoa Porridge with Blueberries & Pecans Recipe - February 13, 2016